Baffling the Baffle: My DIY N52 Oil Pan Saga
- Brandon Meadows
- Mar 10
- 15 min read

Updated: Mar 20

It's been a long journey getting this pile of bolts ready for track duty. Want to know one of the things I love most about this little nugget? It has what appear to be healthy rod bearings. And I plan on giving them a serious workout at High Plains Raceway soon. But before I mount up some relatively wide, sticky rubber, I figured I should give those poor rod bearings a fighting chance by adding some baffling around the oil pickup. After all, there’s something deeply satisfying about doing everything I can to keep the rods inside the block—makes me feel all warm and fuzzy inside. Oil Pan Variants:
Now, before diving into the madness of oil pan baffling, we need to talk about BMW and their endless variations of parts for every trim imaginable. It’s almost as if they’re secretly trying to keep customers perpetually confused. Their oil pans for the N52 are a perfect example.
For reasons known only to the BMW overlords, if you have an automatic N52-powered RWD BMW, it came with an aluminum oil pan. However, if you have a manual, you got a steel oil pan. EDIT: Since posting this, I've received feedback that some manual N52-powered cars also came with aluminum oil pans. There seems to be no rhyme or reason behind this from BMW. My advice: while most N52-powered manuals seem to have a steel pan, it's still a good idea to crawl underneath your vehicle and double-check which pan you have before moving forward. Somehow, I ended up with both a steel and an aluminum oil pan in my garage. I’ll explain how that happened in a bit, but for now, here are some comparison photos of the two pans:


At this point, you might think your journey to finding the right baffle only involves two models of oil pan. But if you happen to own a 2006 325i or 330i, there’s actually another component to consider. For reasons only BMW knows, the 2006 model year includes an oil return line drain tube that isn’t present in the 2007 and newer models.
I managed to grab a couple of screenshots from Condor Speed's oil pan baffle video, showing the 2006 drain tube in question. For the 2006 model year only cars, this tube needs to be trimmed by about four inches in order to install their oil pan baffle kit:


This doesn’t even touch on the AWD variants, which have their own oil pan design due to the front differential and an axle that passes through the pan itself. But for the sake of this conversation, we’ll stick with the RWD variants. This applies to both the 128i and the E9X 325i, 328i, and 330i models.
What’s all this about, and why does it matter? Well, if you plan on installing an oil pan baffle, the material the pan is made from will limit your baffle options. While I’m sure it’s possible to weld a steel baffle into an aluminum pan, conventional wisdom suggests you should weld a steel baffle into a steel pan, and an aluminum baffle into an aluminum pan.
As far as I know, the only oil pan baffle designed specifically for the N52 is from Condor Speed, and it’s made for the steel/manual oil pan.
If you have an aluminum oil pan, there technically isn’t a baffle designed specifically for the N52’s aluminum pan. However, companies like VAC Motorsports and AAF make baffles for the very similarly shaped aluminum N54 oil pan. The internet suggests that the N54 oil pan baffles can be slightly modified to fit an aluminum N52 pan.
Advantages and Disadvantages of Both Oil Pans:
Technically, aluminum has better heat dissipation properties, so in theory, an aluminum pan could shed slightly more heat than a steel pan. Some aluminum pans come with cooling fins to further reduce oil temperatures. However, the aluminum N52 pan doesn’t have any such design features.
On the flip side, despite being made from a theoretically heavier metal, the OEM steel pan is actually about 2 pounds lighter than the aluminum one. I weighed them on a cheap bathroom scale: the steel pan weighs about 8.4 lbs, while the aluminum pan weighs 10.4 lbs.
One of the biggest advantages of the aluminum pans is their affordability and availability. You can find used aluminum N52 pans on eBay for under $100 and brand new knock-off versions on Rock Auto in the $200 range. The OEM steel pans, however, are much harder to come by and typically cost quite a bit more. This is largely because the vast majority of E9X and E8X N52-powered vehicles sold by BMW were automatic, so manual/steel oil pans are rare. Used steel pans are hard to find on eBay, and when they do show up, they usually go for much more than the aluminum versions. Even new steel pans are more expensive, with the cheapest I found going for over $800.
If you plan on welding in a baffle on a spare pan before the full install, I can definitely see the appeal of grabbing an aluminum spare for cost-effectiveness.
Running an Aluminum Pan in a Manual Car:
Now, the big question: Can you install an aluminum pan in a car that originally came with a manual/steel pan? The short answer is yes. The longer answer is that it takes a bit of modification to make it fit.
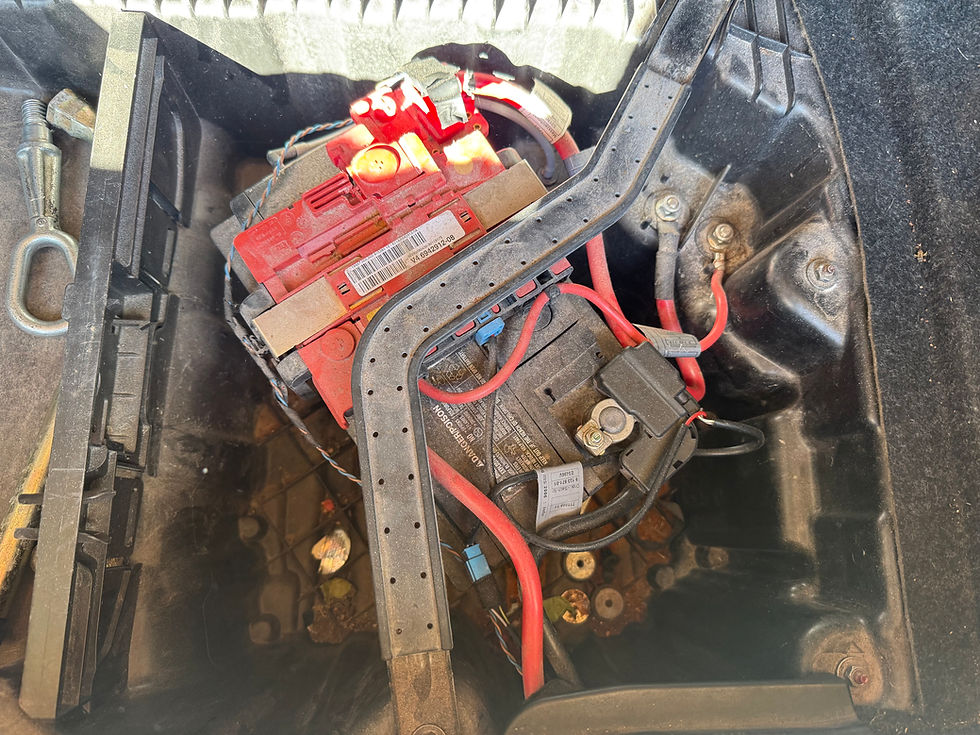
In the automatic N52, the aluminum oil pan bolts to the transmission. If you look at the photos above, you can see that the aluminum pan has provisions to bolt to the transmission, while the manual/steel variant does not. Instead, manual versions of these cars use a thin metal backing plate to cover that space. This backing plate has three encapsulated nuts that secure the bottom portion of it to the manual transmission. You can see two of the three encapsulated nuts that I’m talking about in this photo:

This photo was taken by 1addicts user crowtrobot in his thread, which can be found here.
What he discovered was that the encapsulated nuts prevent the installation of an aluminum pan in a manual car because the aluminum pan can't fully seat far enough back.
The solution? Break out the angle grinder or tin snips and remove those encapsulated nuts:

Once again, thanks to crowtrobot for making this discovery and sharing it with the rest of us.
Third Option?
If you want to avoid the hassle of welding an oil pan baffle yourself, you could give the fine folks at Bimmerworld a call. They offer a fully customized oil pan designed to handle the grip levels delivered by a set of slicks. It’s a beautiful piece, and if I were planning to run R-comps, I might consider justifying the $2249.99 price tag. That said, Bimmerworld mentions that they've never had any issues running a basic baffle on a stock oil pan, so long as you aren’t planning to run anything more aggressive than a 200 treadwear tire. Since I’m not after any more grip than a Super-200 can provide, I opted to skip this option. One thing to note about the Bimmerworld pan: it deletes the factory oil level sensor and requires you to install your own dipstick to check the oil level.
What Did I End Up Doing?
When I first bought my 128i, I had no idea that the oil pan varied depending on the model year and transmission. I came across a cheap aluminum pan that seemed to be in great shape, so I grabbed it without digging into the details. Later, I learned that Condor Speed Shop is the only company that makes an oil pan baffle kit specifically designed for the N52, and that it only works with the manual/steel pan. So, I went on the hunt for a steel pan, leaving the aluminum one I purchased to gather dust in the corner of my garage.
You might be wondering, "Why buy a second oil pan when the stock one would work fine?" That’s a great question. I have no welding equipment, and more importantly, no welding skills. I didn’t want to tear apart my beloved 128i and leave it sitting in the air for long periods while I hunted down a skilled welder. I wanted a baffled pan ready to go before I even turned a wrench. If you can weld, or know someone who can, or don’t mind waiting while you get the pan welded, you can save yourself the headache of tracking down a second pan.
I want to be clear about something: I’m a bit of a cheapskate. As much as I wanted a spare pan, I couldn’t bring myself to drop $800 on one. So, what’s a guy with limited funds to do if he wants a steel N52 oil pan on the cheap? I kept a close eye on my local junkyards until a manual RWD 328i finally showed up on the lot, just waiting to be picked clean!
I drove straight to the junkyard, trusty engine support bar in hand (I apparently place too much faith in Harbor Freight tools!), and got to work:

Since the car had already been picked over by the locals, I didn’t have to remove too many parts. As a result, I had a new-to-me N52 steel oil pan off the car in under an hour. All for the bargain price of just $21!

When I got home and cleaned up the pan a bit, I was pleasantly surprised to find that it was in surprisingly good shape—except for the fact that someone had cut or ripped off the oil level sensor wiring connector.


Around the same time I acquired the extra oil pan, I also ordered a brand new Condor Speed Shop Oil Pan Baffle:

So, About That Welder
As mentioned above, I have no welding skills to speak of. The good news is, I know someone who does: my good friend Justin (JC) from Mototechniq. He managed to get everything perfectly welded in just a few minutes, while I mostly just stood there and tried not to ask too many questions of the man holding a torch.
Further Prep:
Before moving forward, I spent some time removing the old gasket material from the newly baffled oil pan. I mainly used a plastic razor blade and various solvents to avoid damaging the mating surface of the pan.

I then turned to the fine folks at FCP Euro to help me procure everything I might need for this endeavor. I ended up ordering quite a few items (most of which they actually sell as part of an oil pan gasket replacement kit):
Brand new oil pan bolts. Keep in mind that the manual/steel pan and the aluminum pan use different hardware/bolts, so be sure to order the correct set for the pan you plan on using.
An OE Elring oil pan gasket. To my knowledge, all steel and aluminum pans use the same gasket.
Various single-use hardware for any bolts you might loosen or remove during the process.
New OE Corteco motor mounts. To be clear, my stock mounts were working fine, but I added these to the "while I'm in there" list. I’m not keen on lowering the subframe more than necessary, so it seemed like a good idea to replace them now.
An OE Mann oil filter kit, as I’d be changing the oil.
An OE oil level sensor gasket. As mentioned earlier, someone damaged the OEM sensor on the junkyard pan, so I needed to swap my stock sensor over to the new one. This was a good opportunity to replace the gasket while I was at it.

You'll also want to have at least 6.9 quarts of your preferred oil on hand to fill the engine before starting the car. This is probably one of the most important steps in the whole process. I actually put a sticky note over my engine start button to remind myself not to turn the car on until it was topped off with oil. Something about keeping rods inside the block, right?
Be forewarned: While most of this process isn’t technically difficult, swapping the oil pan is fairly involved—you're going to be in there for a while.
I’m wasn't initially writing this as a fully photographed step-by-step walkthrough on how to do this job. There are plenty of videos and write-ups on how to accomplish this task (or at least how to change the oil pan gasket), many of which I spent a lot of time studying before diving in. However, I’ll share the steps I took and a few things I learned along the way, along with shout-outs to some videos that helped tremendously. Honestly, there are too many to list, but a few of the most in-depth ones I found were:
If you’re only changing the oil pan gasket on a RWD car, the video by Zeiten is all you need. Keep in mind, he's changing the gasket on an automatic N51 convertible, which has extra bracing (convertible) and transmission lines (automatic) that you won’t have to deal with on a manual coupe or sedan. This is by far the most efficient method I've seen that involves the least amount of parts removal, specifically for a RWD car—no surprise, since Zeiten appears to be a professional technician. Unfortunately, this simpler method didn’t work with a baffled pan due to needing additional space to ensure the oil pickup doesn’t hit the baffle plates during installation. More on that later.
The most comprehensive installation video I found was from, you guessed it, FCP Euro. Keep in mind that their video is for an AWD automatic variant, which is much more involved than the RWD cars, requiring the full removal of the front subframe (instead of just lowering it in RWD cars). This video goes through every step of the process to remove an oil pan from these cars, but be warned—it will add a few extra hours of labor to the overall job.
I also consulted several sources for torque specs before I got started to ensure everything was properly torqued down. Here are the torque specs, which are in ft-lbs or in-lbs, not nm. If you’re looking for nm specs, you’ll need to do a bit of math:
Oil drain plug: 18 ft-lbs
Oil level sensor: 84 in-lbs (about 7 ft-lbs)
Engine mounts, mount to subframe: M8 bolts to 21 ft-lbs, M10 bolts to 41 ft-lbs
Engine mounts, support arm to engine: 18 ft-lbs + 90 degrees
Front subframe bolts: M10 bolts to 35 ft-lbs, M12 bolts to 77 ft-lbs
Oil pan bolts: M8 x 24-26mm to 72 in-lbs (about 6 ft-lbs) plus 90 degrees, for M8 x 92-112 to 72 in-lbs (about 6 ft-lbs) plus 180 degrees
Steering rack mounting bolts: 41 ft-lbs plus 90 degrees
Steering rack u-joint clamp/pinch bolt (if you remove the steering rack): 16 ft-lbs
Lower control arm(s) to subframe: Grade 8.8 bolts to 50 ft-lbs plus 90 degrees, grade 10.9 bolts to 74 ft-lbs plus 90 degrees (the grade of the bolts should be printed on the bolt head)
Front sway bar mounts: 20.5 ft-lbs
Front sway bar to endlinks (nuts): 43 ft-lbs
I'm sure there are plenty of other things you can remove and torque, but these are just a few I wrote down. Feel free to double-check my figures. For the various-sized bolts, I’d recommend using a set of calipers to measure the diameter of the bolts, as I'm sure some specs/bolt diameters can vary between cars.
Onto the Install
Now that I had everything I needed to get the job done, it was time to get to work.

I actually removed the stock pan by myself in about 3 hours with no major hiccups or frustrations. I took my time and was lulled into thinking this was going to be a painless, easy (if a bit time-consuming) install.
I was mostly just following along with the Zeiten video listed above, and things were going smoothly.
Inside the engine bay, I got to work with the following:
Removed the oil filter
Took out the airbox and intake elbow
Moved the power steering reservoir out of the way (removal wasn’t necessary, just shifting it so I could access the nut on the top of the driver’s/left-side motor mount)
Used a few extensions to remove the nuts from the tops of the motor mounts, which are easily accessible from the top of the car (thanks to those extensions)
Removed all of the rear cowling to also take off the plastic engine cover. The engine cover needs to be removed to access the threaded engine “support hole” (I’m not sure of the actual name for that hole!)
Next, I used an OEM tow hook and threaded it into the "support hole" on the front side of the engine, next to the oil filter housing. I then attached my engine support bar to the OEM tow hook to support the weight of the front of the engine. For added security, I used a padlock and chain, just in case the V-shaped hook failed.

Underneath the car, there was also plenty of work to be done:
Drained the oil (this should go without saying and will help minimize the mess)
Removed all of the underbody splash shields on the front side of the car Removed the lower motor mount bolts to allow the subframe to drop with ease
Disconnected the wiring harness to the oil level sensor, along with the ground wire, which is secured with a 10mm bolt
Removed the three bolts on the transmission side that are connected to the engine backing plate, as mentioned earlier
Loosened the subframe bolts and eventually removed them while slowly lowering the subframe with the help of a floor jack

Now that the subframe was lowered, I was able to remove the stock motor mounts without any issues. Despite the car having 139,000 miles on the clock, I was pleasantly surprised to find that they were in pretty decent shape.

Using a variety of extensions, I was able to access and remove all of the oil pan bolts without issue. That said, I highly recommend wearing eye protection, as a lot of crud is bound to fall down onto your face.
Following the Zeiten method, I used the engine support bar to raise the engine as high as it would go, creating additional space below without having to remove anything else. With just the items removed as mentioned above, and a little wiggling of the subframe, I was actually able to remove the oil pan. It wasn’t too tough. The trickiest part was getting the front of the pan low enough to clear the oil pump. All in all, it was pretty straightforward, and I was starting to wonder what all the fuss was about with this job.


I had heard rumors that the oil pan bolts were of different lengths, which seems to be true for the bolts that go with the aluminum oil pan. Out of caution, I decided to remove each bolt and keep track of its location, just in case the bolts were of varying lengths. As it turns out, this wasn’t necessary, as all of the bolts for the manual/steel oil pan appeared to be the same length.

At this point, I was getting pretty cocky, thinking I’d be done with the job earlier than expected. Honestly, if you're just replacing the gasket on a stock pan in a RWD manual car, you really just need to reverse the steps I listed earlier, torque everything down properly, and you’re good to go.
Around this time, my good friend Justin from Mototechniq showed up to give me a hand. To say I was grateful to have a second set of highly skilled hands going forward is an understatement.
So, what was the problem? Well, you see that black plastic oil pickup on the bottom of the engine? When you’re installing a stock oil pan, you can just slide it back in the same way you removed the old one. However, having welded a baffle into place complicates things and requires a bit more space.
One of the issues I ran into were the two "ears" on the back of the oil pan, pictured here:

Those two ears actually slide inside the transmission backing plate. Here's a photo of the oil pan installed where you can see the "ears" inserted into the transmission backing plate:

This isn’t an issue with the stock pan, as you can slide the pan forward slightly (after clearing the oil pump) and easily get the ears into place. However, with the baffle plates in place, the baffle plates interfere with the plastic oil pickup. Things were about to get more complicated.
The only way I was able to reinstall the newly baffled pan was to install/seat the rear side of the pan first. This meant the subframe needed to be considerably lowered to allow the front of the oil pan to angle low enough to slide the rear into position. Maybe someone else has figured out a way to install a baffled pan with minimal subframe clearance, but I certainly hadn’t.
While we didn’t fully remove the subframe, we had to take off a few components to create the necessary space:
Removed all three of those pesky T30 torx screws holding the coolant hose to the top of the subframe.
Disconnected the control arms from the subframe.
Detached the sway bar from the endlinks, letting the sway bar hang from the subframe (we didn’t remove the sway bar mounts).
Disconnected the steering rack and pinion from the subframe.
We also removed the wheels when we thought we might end up removing the entire subframe.
We did this in various stages, checking to see if we had created enough room to install the baffled pan. After plenty of pulling, pushing, and maneuvering, we finally got the pan seated and torqued down.
Pro tip: As mentioned in almost every guide, it’s a good idea to zip-tie the gasket to the oil pan while you’re getting it into position to prevent it from falling off repeatedly. Once you’ve aligned the bolt holes and lightly threaded a few bolts to hold the pan in place, just remember to cut and remove the zip ties—easy to remember, since you’ll see the giant zip ties sticking out!
Without a second set of hands, this would’ve been significantly more difficult. Thankfully, Justin was not only an excellent help with the wrenching, but he also managed to snap a few candid shots of me while I was working under the car.


If I were installing another baffled pan, I’d likely plan to fully remove the subframe for easier reinstallation.
To torque down the pan, I used a criss-cross pattern, starting at the middle of the pan. I marked each bolt with a light blue paint marker to help keep track of the sequence and as a reminder of what we had already torqued down.
Once everything was buttoned up and torqued down, we filled the car with oil, and it fired up without issue! No visible leaks that we could see—success!
From start to finish, the entire job took about 9 to 10 hours of total labor time. If I were just replacing a gasket on a stock pan, I could have shaved 2-3 hours off the time and avoided some of the extra effort.
Later that evening, I took the car for a 15-20 minute drive, and it felt just like it did before! The next morning, I got it back up in the air, and once again, no signs of leaks!


Overall, this wasn’t the most pleasant job, but I’m glad we managed to get it done. While the car might have survived track work without a baffle, in my book, it’s cheap insurance that’ll give me peace of mind when I head out to High Plains Raceway in the not-so-distant future. Track season is coming, after all!


Comments